
BytzVPN - iOS Installation
Video of Instructions
Instructions

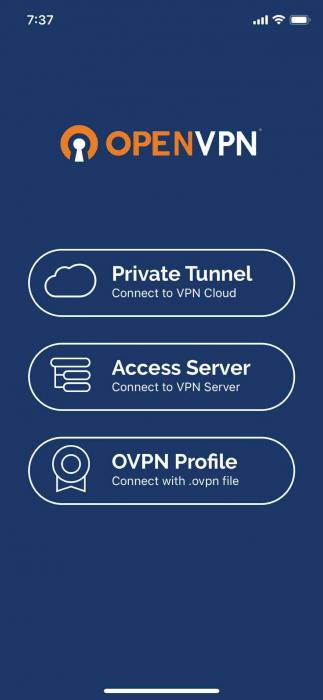
First, download the OpenVPN Connect app from the AppStore
Before you proceed, make sure you have your BytzVPN username and password available. During purchase, it will be automatically
created and you will see it in MY SERVICES - MY VPN SERVICE on Brax.Me.
You will also receive
a chat message from Tech Support with the credentials.
Next, make sure you are looking at these instructions on SAFARI (don't use other browsers for this like Brave, or Firefox) and go back to this installation page for IOS.
VPN PROFILES
VPN Profiles or the ovpn files needed by the app are found in Brax.Me MY VPN SERVICE for those with active subscriptions.
IMPORTING PROFILES TO OPENVPN
On IOS, there is no direct access to downloaded files. So unfortunately there are several extra steps. After
files are downloaded, they have to be shared to the OpenVPN app. These instructions below are for those who do
not know how to share a download to a specific app like OpenVPN. This guide assumes that you are running Brax.Me
from a browser.
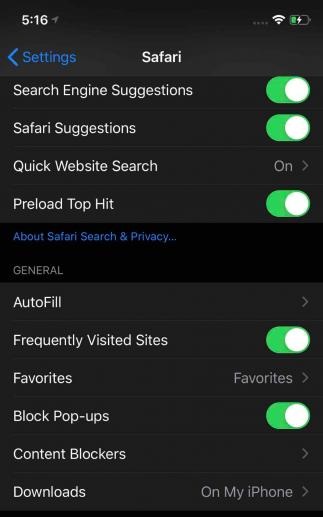
1. Before we start, we need to check that Safari is set to download files to the phone. Go to Settings
on the iOS and find Safari. And then ensure that the DOWNLOADS option is set to "On My iPhone" as shown
in the picture below.
2. Now, download the ovpn profiles you want from the list of VPN profiles shown in the Installation Guide in Brax.Me SETTINGS - MY VPN SERVICE.
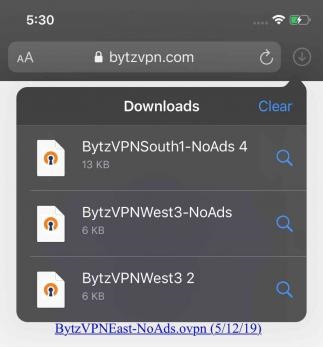
3. After the download is complete (of one or more ovpn files), there will be a blue down arrow icon in
the upper right hand corner of Safari which will indicate that files
were downloaded. Click on that blue down arrow.

4. This will now display the downloaded file. Or if you did this for several files
you may see several on the list. We will only work on .ovpn files on
the list. Here's an example showing multiple downloads.
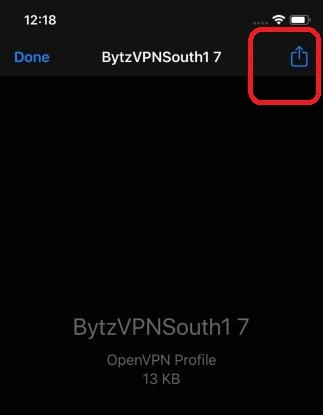
5. Now click on the first ovpn file you want to import, and this new page
below will appear. Pay attention to the Blue Share icon on the upper right hand corner.
Click on that.
6. A scrollable list of app icons will appear below. You will need to scroll that
list to the right.
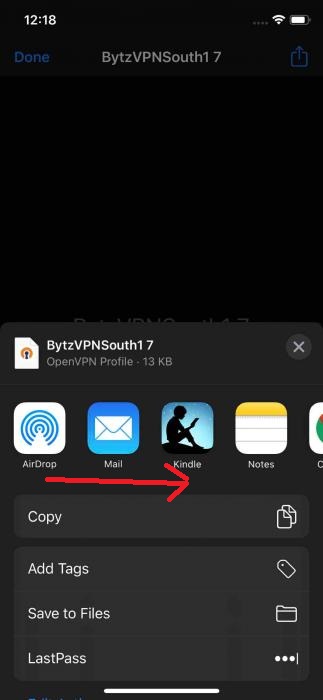
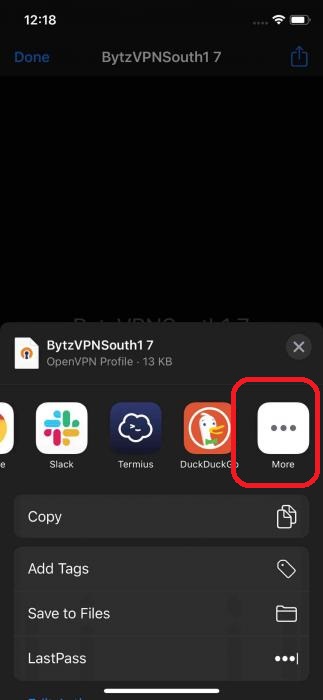
7. The very last app icon on the right will have the 3-dots (ellipsis) as the icon.
Click on that.
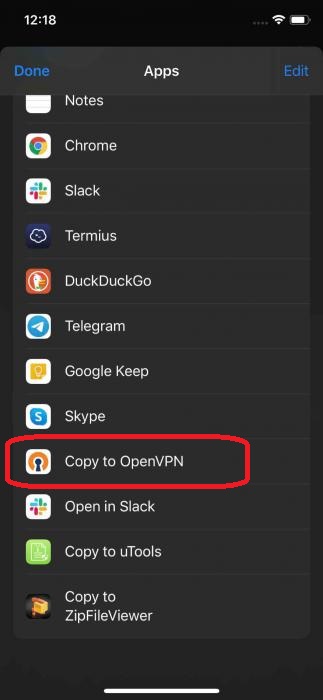
8. This will now display the list of apps below. Look for the option
COPY TO OPENVPN. And click on that.
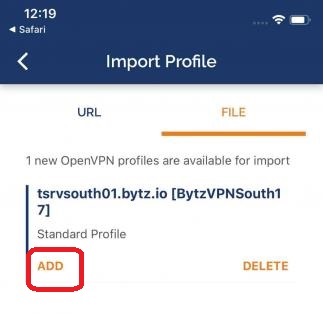
9. The .ovpn profile will now be available for adding to OpenVPN. Now, click on
Add.
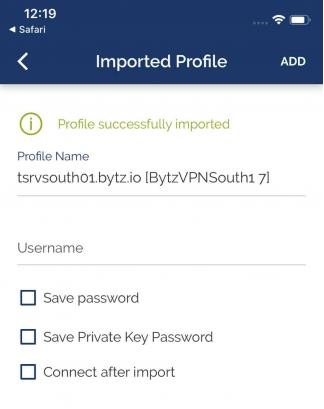
10. The profile will now be added and now the final step is to enter your
VPN credentials which is your username, password.
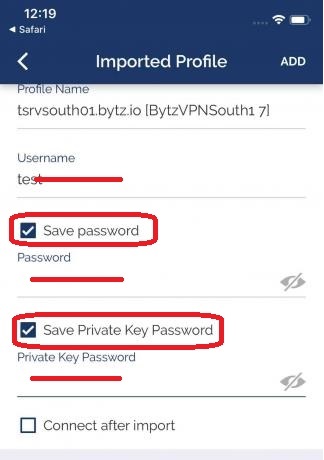
11. Make sure to check the box on Save Password, Save Private Key Password so
you can enter your credentials.
Then when you are done, click on the Add
option on the upper right hand corner.
12. When you have completed adding all the profiles, it will show the list of VPN profiles as shown in the example below.
The list will be based on what you have imported.
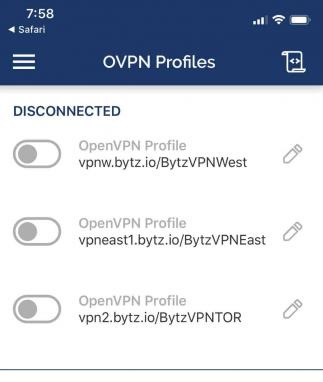
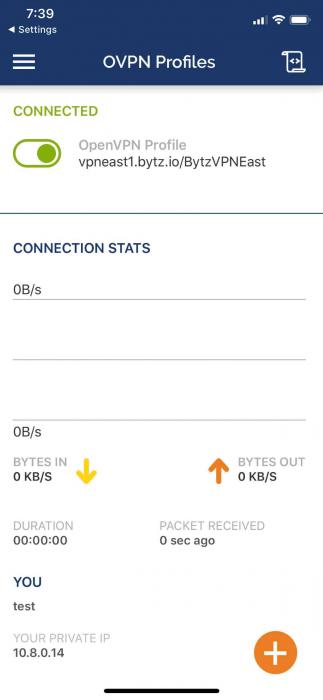
13. To use a VPN, select the desired VPN (it will get a checkmark), enter the login credentials (username and password) given to you. Select SAVE to save the settings and connect.
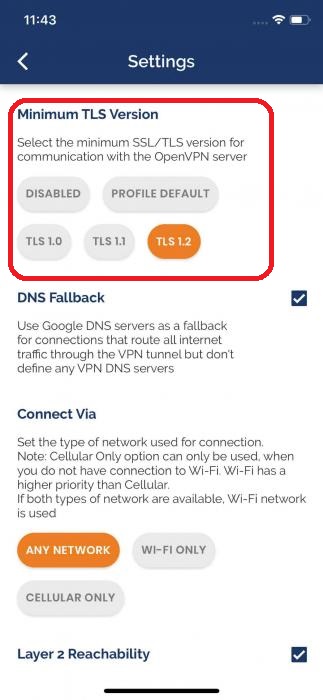
14. One final thing, go to SETTINGS on OpenVPN and in the TLS section,
select TLS 1.2 if that has not been selected.
 BytzVPN - iOS Installation


