
BytzVPN - Windows Installation
BYTZVPN CREDENTIALS
You will need your BytzVPN username and password available to respond to the login prompt for the VPN. During purchase, your credentials are
automatically created and you will see in MY SERVICES - MY VPN SERVICE on Brax.Me.
VPN PROFILES
VPN Profiles or the ovpn files needed by the app are found in Brax.Me MY VPN SERVICE for those with active subscriptions.
A - OPENVPN CONNECT INSTALLATION
Install the msi file downloaded from the link above by clicking on it from your downloads folder.
You will be prompted to provide an Adminstrator login and password before installations starts.
B - STARTING OPENVPN
OpenVPN Connect can be found in START after the installation. Start the app and that should display the screen shown below.

Switch to the option to display FILE and this will show the screen below.

From here you can drag and drop ovpn files from your Downloads folder or browse
the files manually. For every ovpn file you open, you will then be shown the next screen.

Enter your credentials as provided to you on Brax.Me SETTINGS - MY VPN SERVICE.
Make sure to check the box "Save Password". Then click on CONNECT to save the setting. It will then do a connection to the VPN.

You will see your imported VPN profiles as an option to switch on.
When you toggle the VPN on and it is sucessfully connected, it turns green as shown above.
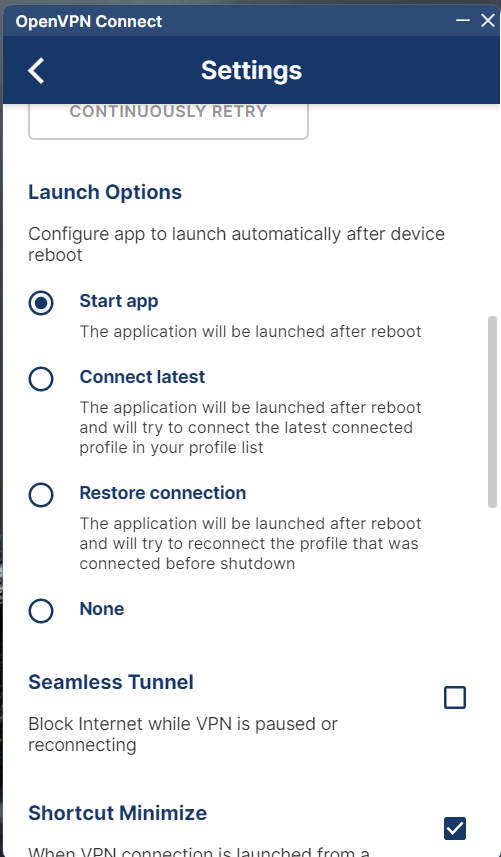
To Auto-Restart OpenVPN after a reboot, go to Settings on OpenVPN and select the option that you prefer: "Connect Latest", or
"Restore Connection". Also recommendeded is to enable "Seamless Tunnel" so that if the VPN network goes down, OpenVPN will act as a kill switch.
 BytzVPN - Windows Installation